Wednesday, March 26, 2014

Maps - moving towards a battlefield landscape

Getting the terrain right for Auldearn might be trickier than first seems.  Although the battlefield is on gently rolling countryside, what you can see on foot is a lot different from what you expect to see from a map or satellite image.  Two to five metres elevation hides a lot of things so a lot can happen between a couple of contour lines.  That being said, this map from Historic Scotland's battlefield archaeology team is a good start.

Ordanance survey maps are still some of the best maps in the world getting the right amount of detail with excellent clarity. In addition, Historic Scotland did some soil analysis and identified areas of alluvium - pinpointing areas of marsh which have since been drained. 


The oldest map of the area I could find was General Roy's from 1746-7, one hundred years after the battle. In the century since Auldearn, new farming techniques had begun to reclaim land by defining surface drainage through better control of the natural stream systems. However, on Roy's map, areas of marshy ground can still be seen.


If we look at the image on GoogleEarth the areas of poor drainage, tied to the presence of mapped alluvium still show up


These played a significant part in the battle, funneling the Covenanters towards Auldearn, whilst constricting their deployment.  Although Garlic Hill is fairly high, enough topography exist around Aurldearn and the ridge running south that vision would be limited.  If you look at the video posted earlier on this blog, irrespective of modern housing and trees, you still blind to whats going on only a couple of hundred metres away.  So you can just imagine the Gordon Horse suddenly merging from cover and causing a surprise!


By simplifying the ordnance survey map, highlighting the contours and shading them, placing on streams and alluvium, the general shape of the old village, the battle field begins to take shape.  Garlic Hill points like a dagger into Auldearn, showing how Hurry could have over the course of a days fighting begun to suffer from "target-fixation"!


Tuesday, February 25, 2014

Buchannan's Foote


Sir George Buchanan received his commission in August 1643.  However, rather than raising the regiment for the army of the Solemn League and Covenant, his followers raided Mugdock Castle, home of Clan Graham (the seat of the Marquis of Montrose).  The regiment was raised in western Stirlingshire, before moving north in the summer of 1644, campaigning through Aberdeenshire and Turiff before becoming the garrison of Inverness.


With Lawer’s regiment, it the spent the balance of the winter improving the town’s defenses and then harrowing the lands of the Grant’s.  When Hurry arrived a detachment was sent from the garrison with the field army to Auldearn, though no records of its actions remain.

The regiment remained as the garrison of Inverness, through 1647, forming the main defense against Montrose during his siege.  By early 1647 it had disbanded.


I only painted the command base for this regiment, the infantry will be supplied by excess figures from Findlatters and the Northern Levies.  Alternatively, I'll use some dragoons I'm painting at the moment.


Buchannan's regiment was understrength at Auldearn, the rump of the regiment remaining at Inverness.  So rather than have a very small pike block, with little wings, it will be deployed as a unit of commanded shotte. This should add a little variety to the massed ranks of the Covenanters. 

Monday, February 10, 2014

Sir John Hurry - Command Base

Sir John Hurry (or Urry) was born in Monymusk, Aberdeenshire, and gained his military experience, like most Scot's, fighting in the Thirty Years Wars.  In 1639 he returned to Scotland, to serve the Covenant in the Bishops Wars. In 1641, he was approached by royalist conspirators in a plot against the Earls of Lanark, Argyll and the Marquis of Hamilton.  However, he revealed the details of the plot (known as "the Incident") to Leslie.

When the war broke out in England he initially joined the Parliamentary side where he fought at the siege of Portsmouth and battles of Edgehill and Brentford under Essex. Promotion followed but not of a rank which Hurry felt sufficient, so he promptly deserted to the Royalist cause in Oxford. With the information he brought on Parliaments dispositions, Rupert acted at once, leading a raid which resulted in the Royalist victory at Chalgrove Field and the death of John Hampden. As a reward, the king knighted Hurry and gave him an independent cavalry command. Thereafter, he led these troops behind Essex's army into Buckinghamshire, causing widespread panic as far afield as London.

As Rupert moved north, he accompanied the army to Marston Moor.  Here he fought alongside Sir Charles Lucas on the victorious Royalist left wing, but with little avail to the overall result.  Again, Hurry defected and although initially the Committees of both Kingdoms ordered his arrest, he was again allowed to join the Parliamentary forces in October 1644.


In early January, 1645, Hurry was appointed Major General and Colonel of Dragoons with the Army of the Solemn League and Covenant.  Here he was appointed second in command to Lieutenant General William Baillie, and sent north to deal with Montrose.  Unfortunately, Baillie had little like for Hurry, remembering they had faced each other at Marston Moor, which ultimately reflected in some of the poor coordination between the two in the coming campaign.

Initially Hurry captured Aberdeen, only to march away the next day.  Furthermore his pursuit (or lack of) after the sack of Dundee brought little but disdain from Baillie.  However, it was Baillie who divided his forces resulting in Hurry fighting alone at Auldearn.  Here, he fought well and although defeated was one of the last to leave the field (albeit on a swift horse). He resigned his commission, perhaps through pressure from the Committee or Ballie, under the time honored guise of ill-health.


His recovery was quick, and he fought on the side of the king (and covenant) during the 2nd and 3rd Civil Wars. However, by siding with the Engagers and the Duke of Hamilton, his card was marked by the Covenanter Committee of Estates. Although captured at Preston in 1648, he escaped to the continent where he found favor with the royal court in exile.

He was appointed Major General to Montrose for the ill-fated Carbisdale campaign, where he was wounded and captured. This time he was unable to escape his fate and the long list of his erstwhile enemies/allies lined up to see him beheaded in Edinburgh on the 29th of May 1650.


Hurry was "a soldier of fortune of great bravery, experience and skill, his frequent changes of front were due rather to laxity of political principles than to any calculated idea of treason". In effect he changed his colors one two many times, pissing off everyone he knew, driven only by blind ambition and greed..


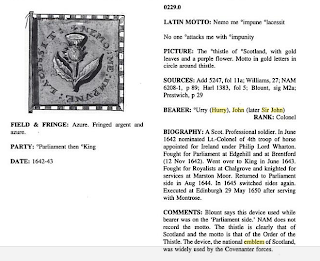
The figures are again Eureka Miniatures.  Hurry is the Lord Gordon figure but whose to say he doesn't look like the man (maybe his flowing locks are a bit to flamboyant for a protestant).  The standard bearers grey turned out really nice to paint but the detail was crisp and sharp on all the miniatures.  The actual guidion is Hurrys, described below.


Friday, January 3, 2014

Happy 2014

I'd like to wish everyone a happy and fruitful 2014.  Also a big thank you to all the people who come and visit this blog, the regulars and the wanderers.

I don't get as much of a chance to reply to all the comments and even less to visit and comment on all the great blogs out there.  However, it is down to you guys and your interest that this blog is still going. Your support and encouragement has provided lots of inspiration and helps us stay the course.

Hopefully 2014 will see us cross the line!

Most of the armies are painted - outstanding are Buchannan's, Seaforth's and all the royalist cavalry.

Also we hope to build proper boards that accurately reflect the terrain on the field.

So thanks again for looking - should have some more action soon.

Awra best!

Roy

Saturday, December 14, 2013

Command Base - Covenanter Cavalry

Eureka Miniatures Cavalry - sold as Gordon Horse but like most figures in this period they work well with most of the armies.  I like these guys as the horses are pretty placid compared to the Perry ones.


Standard is conjectural but is taken to represent the one from Campbell of Lawers Troop.  Motto and heraldic boar both feature in various sigils and crests from this branch of the Campbells.  Worth noting that these guys weren't the usual Argylle Campbells, rather they were raised in Auchterarder, at the head of Loch Tay under the shadow of Ben Lawers.


The one draw back with the Eureka figures is getting the figures to sit well on the horses - was a real struggle getting them on and even then they seem to be sitting like the have a bad dose of the Duke's (again you'll need someone from Scotland to translate that :-)).


Thursday, December 5, 2013

Command Base - Warlords Montrose

Sometimes it's easy to become a bit of a figure nazi.  Most of the stuff you see on this blog is either Perry or Eureka Miniatures - a lot of that is to do with size, what we've been looking for in poses or we just like the sculpts.  That being said there are many other great figures out there.

Warlord Miniatures fit well size-wise and if we hadn't bought all the lead before they released their ranges (yes we've been going that long) we would likely have used a lot more of their figures.  That being said, here's Warlords Montrose figure.

But who's to say it's the great man himself?  He could just be some other long haired fop and as such makes a nice addition to any command base.  I added him to some odd figures I had left around, making a nice wee "advancing" vignette.  So looks like some government troops are on the hunt for a dram.


Thursday, November 28, 2013

The Earl of Lothian's Regiment


Raised by the Earl of Lothian in March 1642 for service in Ireland, the regiment seems to mainly have recruited in and around Jedburgh. Here it was commanded by its lieutenant Colonel, Walter Scott as the selected their minister (John Scott).  Shipped to Ireland in late summer, it participated in Leven’s two September campaigns.  It continued to serve in Ulster until withdrawn in February 1644.  On return, it was quartered in the central west (Paisley, Govan, Refrew and Pollock) where low morale led to some of its Captain’s plotting to join Montrose.  However, with the outbreak of hostilities in Huntly’s  lands led the regiment north, where they sacked Kincardine Castle and Gordon of Drums lands.  By summer they had marched south to Roxburghshire leaving a legacy depredations behind.  Although due to assemble with the army in Perth, they were late to arrive and thus missed the battle at Tibbermuir.

Sent north again in the autumn of 1644, it again operated with Lawer’s regiment and was based out of Aberdeen and Inverness.  By spring 1645, with Montrose ascendant after his winter campaign, Lothian’s  (7thMarch) vacated Aberdeen to the Royalists, thus having extorted lodging and supplies but offered little in protection!
By late March, the regiment was in Brechin with Lieutenant General Ballie, but with Montrose’s sack of Dundee it was placed under Hurry, returning north to Aberdeen.  Here the regiment mutinied over pay and clothing, before marching out for Auldearn.


Along with Louden’s Foote, Lothians regiment formed the right flank of the front line and initially where successful in driving in the royalist line.  However, as the fighting bogged down, confusion with the cavalry guarding the flanks ensued, as Royalist reinforcements arrived.  The cavalry wheeled in the wrong direction, and got entangled with the infantry, disrupting the formations.  As with Lawer’s, Lothian’s were singled out for special treatment by the Irish on account of their Ulster experience and lost over 50%.  Two of its captains, Sir John and Sir Gideon Murray fell.


The remnants of the regiment retreated first to Inverness, before returning to Aberdeen and then Dundee. Over the next two years, the regiment continually was a candidate for amalgamation with other units.  Although eventually built up, it was finally disbanded in 1647.


This was the last big regiment to be painted but I wanted a wee change from the usual hidden grey.  Some of the regiments the Scottish Government sent to ireland were clothed by the English Parliament, using red cloth.  However, this would have been replaced as it got worn out and would have been a bit washed out.

To get this effect I made sure that about a third of the regiment was in grey's, but the balance would be painted with red jackets.  One of the big things I've tried to avoid is making the units too "bright" - you see a lot of ECW armies painted up like early 90's GW models - to uniform and way to clean.  So just like the hidden grey and the scot's bonnets, a mix of tones were selected to give the unit a weather-worn feeling

Pike Blocke

The Pike shows the range in tones pretty well, with the madder red providing the dull tone and a scarlet giving some of the reds a bit of zing.  Some armored pike provide a different feel and help break up the uniformity of the poses from the standard Scot's.


Command Base

As with most of the standards I had to be creative - the Earl of Lothian was a Kerr, so I took the blazon sun emblem from their crest and used that on the colonels colour.

When I started out, I kept on feeling it looked like the sun at the start of the TellyTubbies but it came out okay in the end.


Shotte Sleeves

As with the last few units, I've made the bases into mini vignettes with officers, halberd armed sergeants, dead and musicians.

The later must have picked up the flute when he was in Ulster, probably as an apprentice...